

Products You May Like
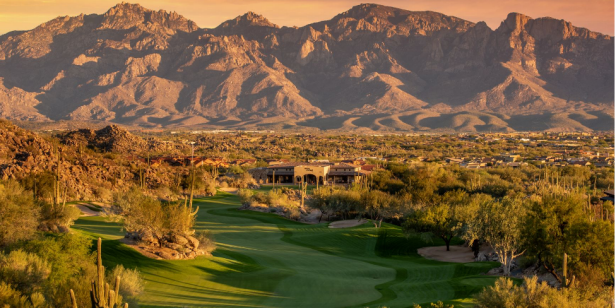
Though Phil is likely very familiar with this desert oasis, the other players—and perhaps many viewers—will not be. So we’ve compiled information and photos on every hole, so you can have a sneak peek at the host venue.
First hole: Par 4, 426 yards from back tees, 369 yards from next set.
The opening hole is a dogleg left that gently opens up past a group of desert brush and trees (yes, there are some trees at this desert course). The second shot will play slightly downhill to a pretty generous green guarded by bunkers on the left.
Here’s a view from behind the green:
Second hole: Par 5, 559 yards from back tees, 499 yards from next set.
Though the shortest hole on the course, this par 5 requires strategy. The fairway runs into desert brush, requiring players to play short of it. Position is key being able to go for this well-protected green in two.
Here’s a view of the disconnected fairway, running into the bunkers and desert brush.
Third hole: Par 4, 386 yards from back tees, 328 yards from next set.
This is a short par 4 that again demands sound strategy and execution. We can imagine Phil Mickelson will try to cut the corner over the rock outcroppings to set Charles Barkley up with a short second shot. (We’ll likely see that play from Phil a lot.) The best angle playing into this green is from the right side of the fairway, but that also leaves for a longer approach.
Here’s a view from the corner of the dogleg looking up at the green:
Fourth hole: Par 4, 374 yards from back tees, 352 yards from next set
In the video course tour on Stone Canyon’s website, Mickelson narrates saying: “Accuracy, not length, is the objective” at this par 4. We’ll see if he listens to his own advice—or if he and Barkley are down early, whether he tries to hit a big “hellacious seed” over the right corner. A two-tiered green means coming into the elevated green with a short iron will be key to controlling your distance.
Here’s a view looking up at the green:
Fifth hole: Par 4, 425 yards from back tees, 350 yards from next set
This is a tremendous downhill par 4 that meanders down into the valley. A tee shot down the left center will avoid the fairway cutting out on the right side. This is also a two-tiered green.
Here’s a look from behind the putting surface:
Sixth hole: Par 3, 145 yards from back tees, 125 yards from next set
Stone Canyon’s first par 3 is also one of its most memorable. The shortest hole at the club is framed by a 60-foot waterfall that flows down the left side of the green and in front of the surface. It’s a small, uphill target to hit, but it’s also a flattish green. There could be some fireworks here during The Match.
Seventh hole: Par 5, 554 yards from back tees, 484 yards from next set
This is a wide fairway to hit, but you want to be on the right side in order to hit the green that’s perched up on the left side of this hole and protected by three bunkers.
Eighth hole: Par 4, 403 yards from back tees, 319 yards from next set
Golfers are faced with the most difficult tee shot at the eighth, with a narrow landing area framed by bunker and ripples in the fairway. The green at the eighth hole might be one of the most challenging to hit, too, with a severely undulating green protected by three intimidating bunkers and a false front. This will not be a birdie hole during The Match.
Here’s a look looking up to the approach at the eighth green.
Ninth hole: Par 3, 227 yards from back tees, multiple options with 10 tee boxes
One of the most scenic views at Stone Canyon comes from the back tees at the par-3 ninth. The green plays as much as 160 feet down from the tee into this large green carved into the valley. There are 10 sets of tee boxes at the ninth hole, so we’ll have to see where organizers put the Chuck tees on this one.
10th hole: Par 5, 622 yards from the back tees, 540 yards from next set.
This is a great risk-reward hole. A generous landing area can be found from the elevated tee, but the options present themselves on the second shot. Big hitters can take on a long forced carry over water, and if you lay up to the left, you have to be precise with your placement. The green is a small one for a par 5, protected by bunkers on both sides.
Here’s a view off the tee:
11th hole: Par 4, 435 yards from the back tees, 391 yards from next set.
A rather straightforward tee shot to a sloping fairway is all that’s needed at 11. The approach to a narrow green perched up hill and protected by bunkers presents the challenge here.
12th hole: Par 4, 458 yards from the back tees, 418 yards from next set.
Named “Devil’s Bunker” after a sand hazard that used to cut through the fairway, this is still a demanding par 4. A long swath of desert wash cuts across the fairway about 190 yards out from the green, making for a tough approach.
Here’s a view from behind the large-ish green:
13th hole: Par 4, 432 yards from back tees, 363 yards from next set.
It’s important to leave your tee shot on the left side of this fairway—if you’re on the right, you’ll have a blind approach to this uphill, shallow green.
Here’s the view off the tee to this dogleg left hole:
14th hole: Par 3, 193 yards from back tees, 170 yards from next set.
Another scenic par 3 at Stone Canyon. The green sits at the base of the Tortolita Mountains, framing this downhill tee shot.
Here’s a view from the mountains behind the hole:
15th hole: Par 5, 632 yards from back tees, 578 yards from next set.
Another monster par 5, and this one presents a number of options. A conservative play on this zig-zagging hole is the smart play—finding the fairway is important here. The fairway runs out before the green, meaning this is a three-shot hole for most players. This will be a great match-play hole.
Here’s a view from behind the hole:
16th hole: Par 3, 237 yards from the back tees, 180 yards from next set.
This par 3 plays slightly downhill to a green protected by a collection area in front. The green is relatively big, so hitting to the large target on the left is the prudent play. But if the hole is on the right side, a two-putt is no bargain—this is one of the toughest greens to read on property, we’re told.
17th hole: Par 4, 306 yards from the back tees, 275 yards from next set.
The view from the back tees is phenomenal, giving golfers a 360-degree look at the valley and the entire property. This short par 4 will be drivable for Mickelson and Curry—but there’s trouble to be found here. The hourglass-shaped green is also protected by six bunkers, so golfers need to be careful about where they leave their tee shots.
18th hole: Par 5, 503 yards from the back tees, 415 yards from next set.
A thrilling finisher—the long par 4 plays over a desert island to a fairway that slopes left to right (watch out for the vegetation guarding the left side of this fairway). The hole rolls slightly downhill to a large-ish green to finish.
There’s also a 19th hole at Stone Canyon—in case The Match is tied through regulation, we’ll see if the 107-yard bye hole is put into place . . .